My Favorite Cut-Out Sugar Cookies
It’s that time of year cookies are in the air. And for me, it’s not the holiday season without making a batch of cut-out sugar cookies. I have shared this recipe a few times over the years on my blog - I think I have been making it for longer than I’ve been blogging! And it’s pretty much the only sugar cut-out recipe I will ever make. It’s a super yummy sugar cookie, that is soft but also holds the cut-out shapes very well.
This cookie deserves a recipe post before Christmas.
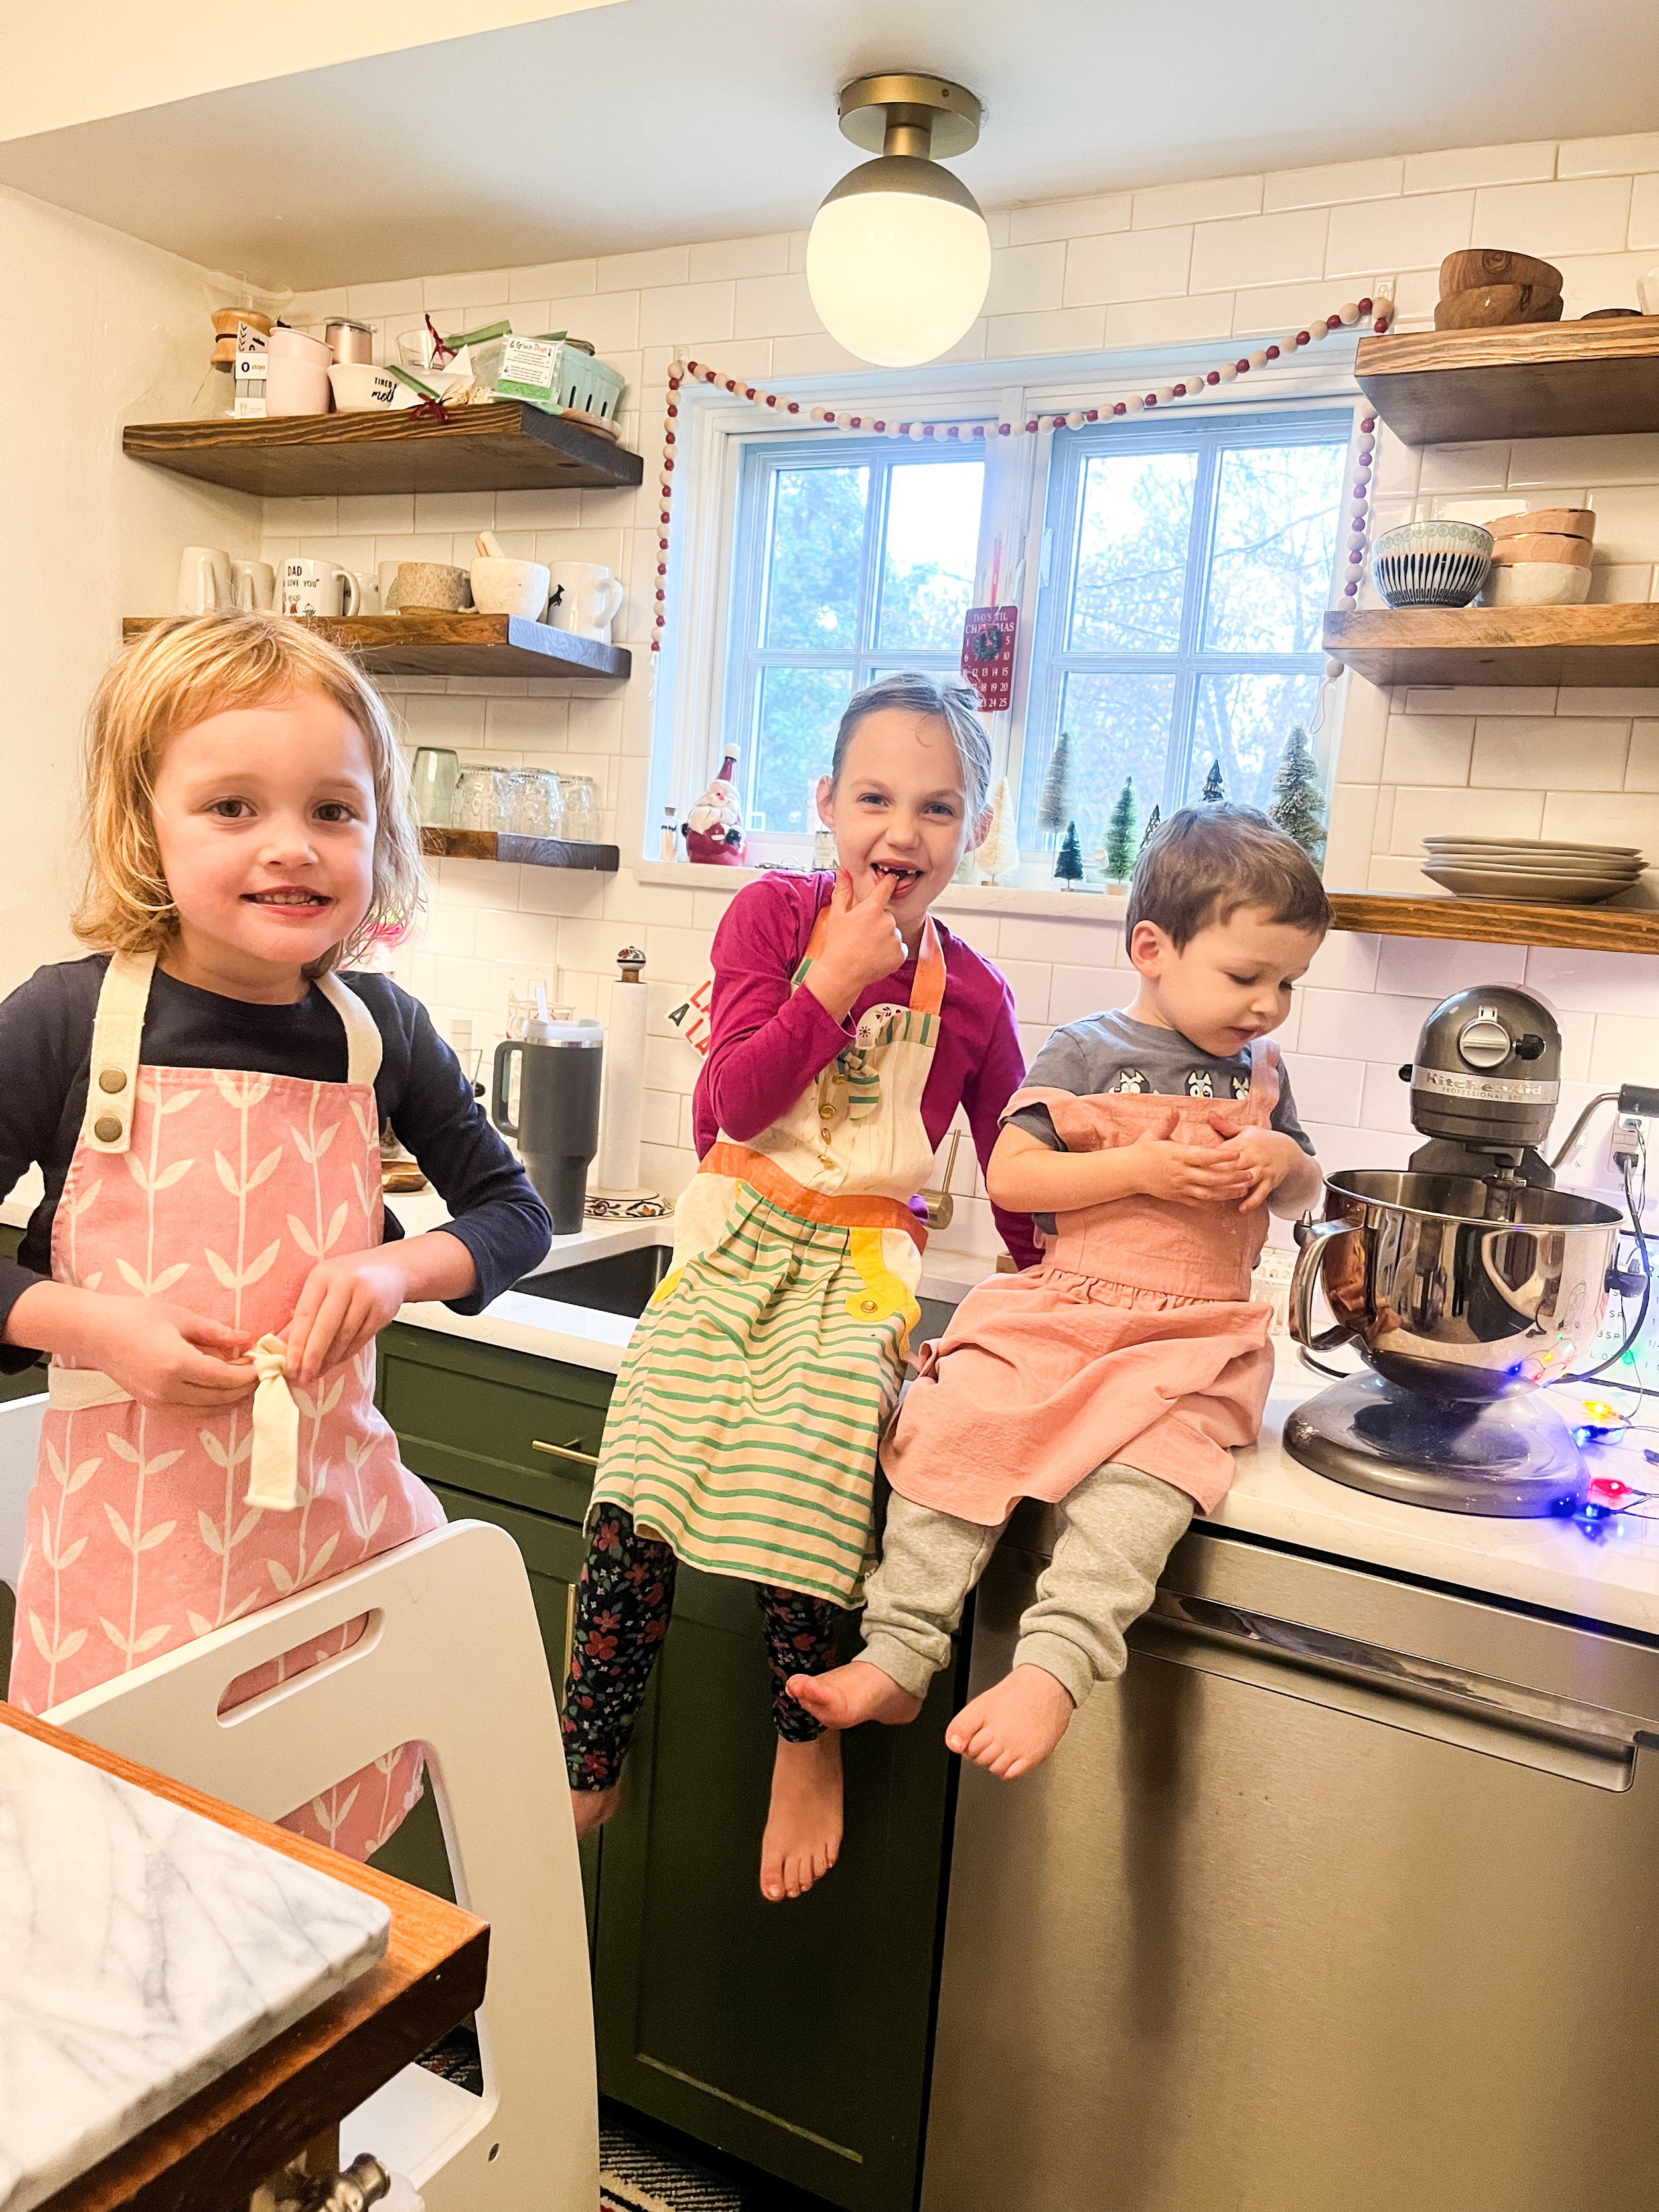
I find that when I am stressed and feel overly busy with the mental load in my mind, I turn to baking to help calm things. Today, I baked with my kids. It’s not AS calm as it would have been if I was alone, but it still helps make the day feel a bit brighter. And I know my kids are making memories as we do it. I know I sure am.
Remember - these don’t have to be perfect. And most of the time when I am baking them with my kids, I just use a store bought icing to decorate. The frosting recipe below is rather simple if you do make it, it’s my favorite one to use. It won’t be the royal icing kind - it’ll be more like a buttercream - but I personally love using this one for kids and find it a little easier to have fun with little hands. And I love the taste of them with this frosting!
I hope you enjoy these as much as we have! I also shared this recipe in my Cookie E-Book. It has my top 10 recipes and snag a copy of it here if you haven’t already!
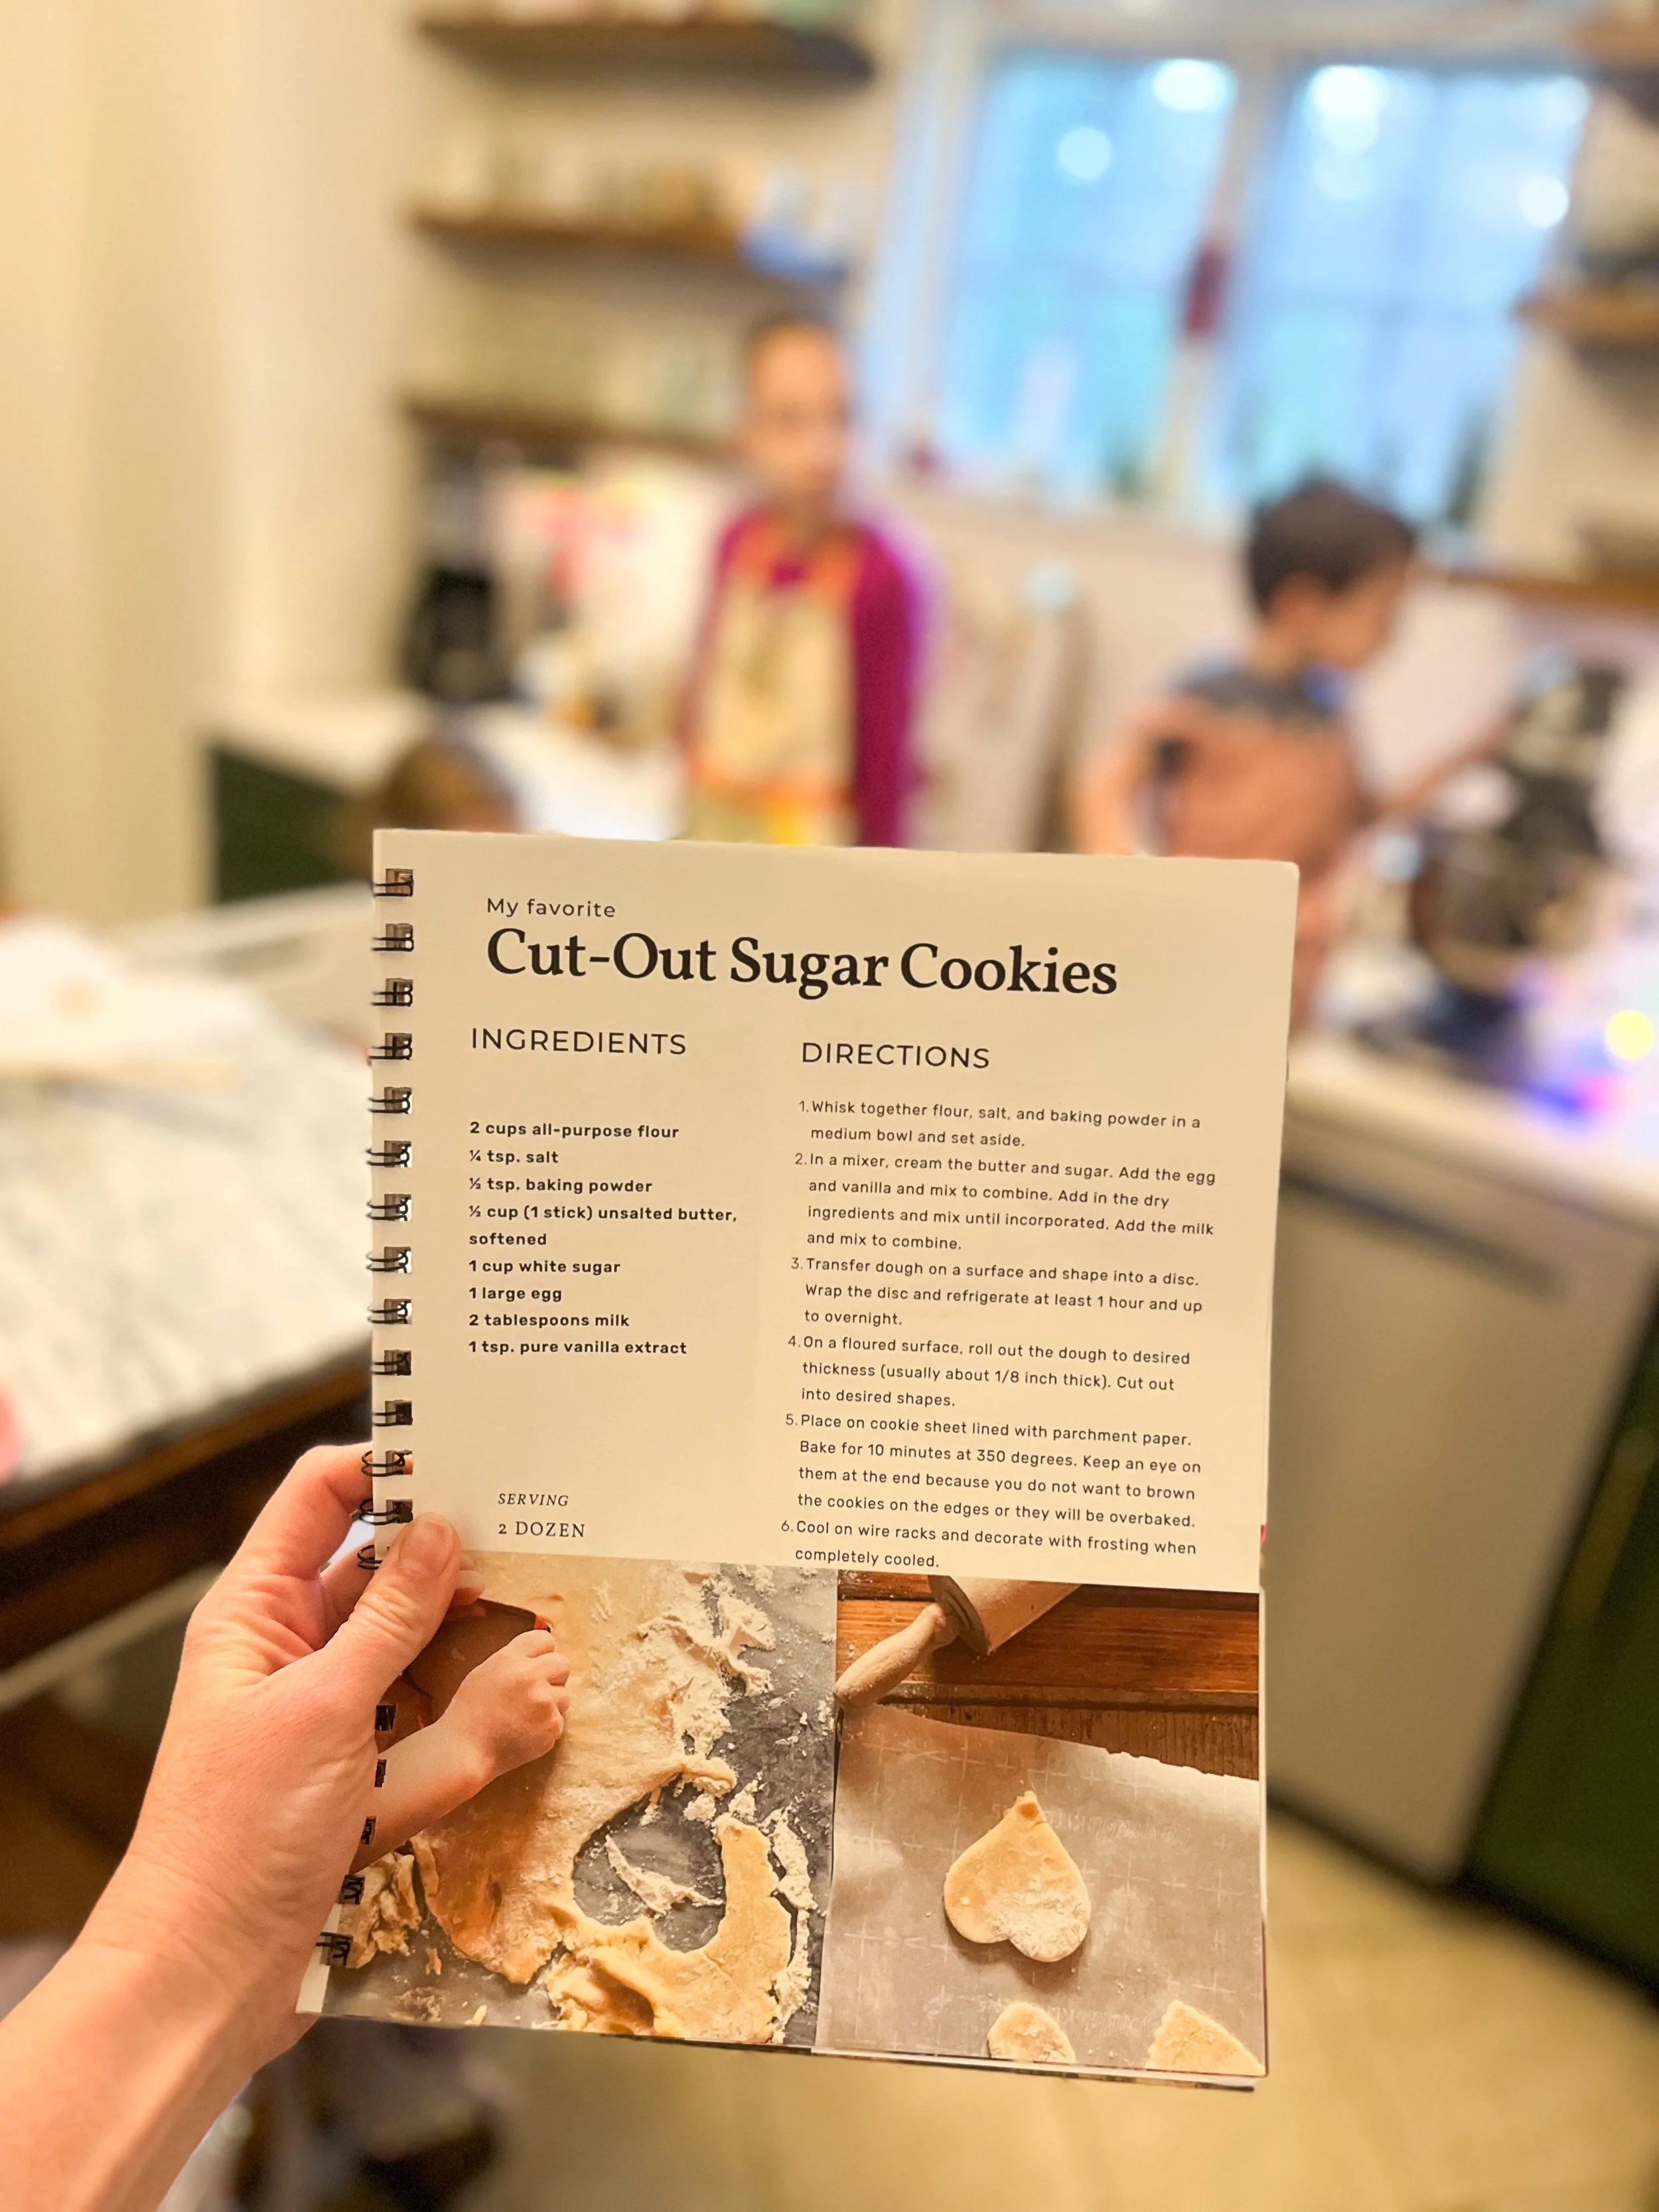


My Favorite Cut-Out Sugar Cookies
1/2 cup (1 stick) unsalted butter
1 cup white sugar
1 egg
1/2 teaspoon pure vanilla extract
2 cups all-purpose flour
1/2 teaspoon baking powder
1/4 teaspoon salt
2 tablespoons milk
Instructions:
In a mixer, cream the butter and sugar together until light and fluffy. Add in the vanilla and egg and mix to combine.
In a medium bowl, whisk the flour with the salt and baking powder. Gradually add to the butter mixture, beating to combined.
Add in the milk, 1 tablespoon at a time. You may need add more milk if the mixture is too dry.
Form the dough into a flattened disk and wrap in plastic wrap. Refrigerate 1 hour.
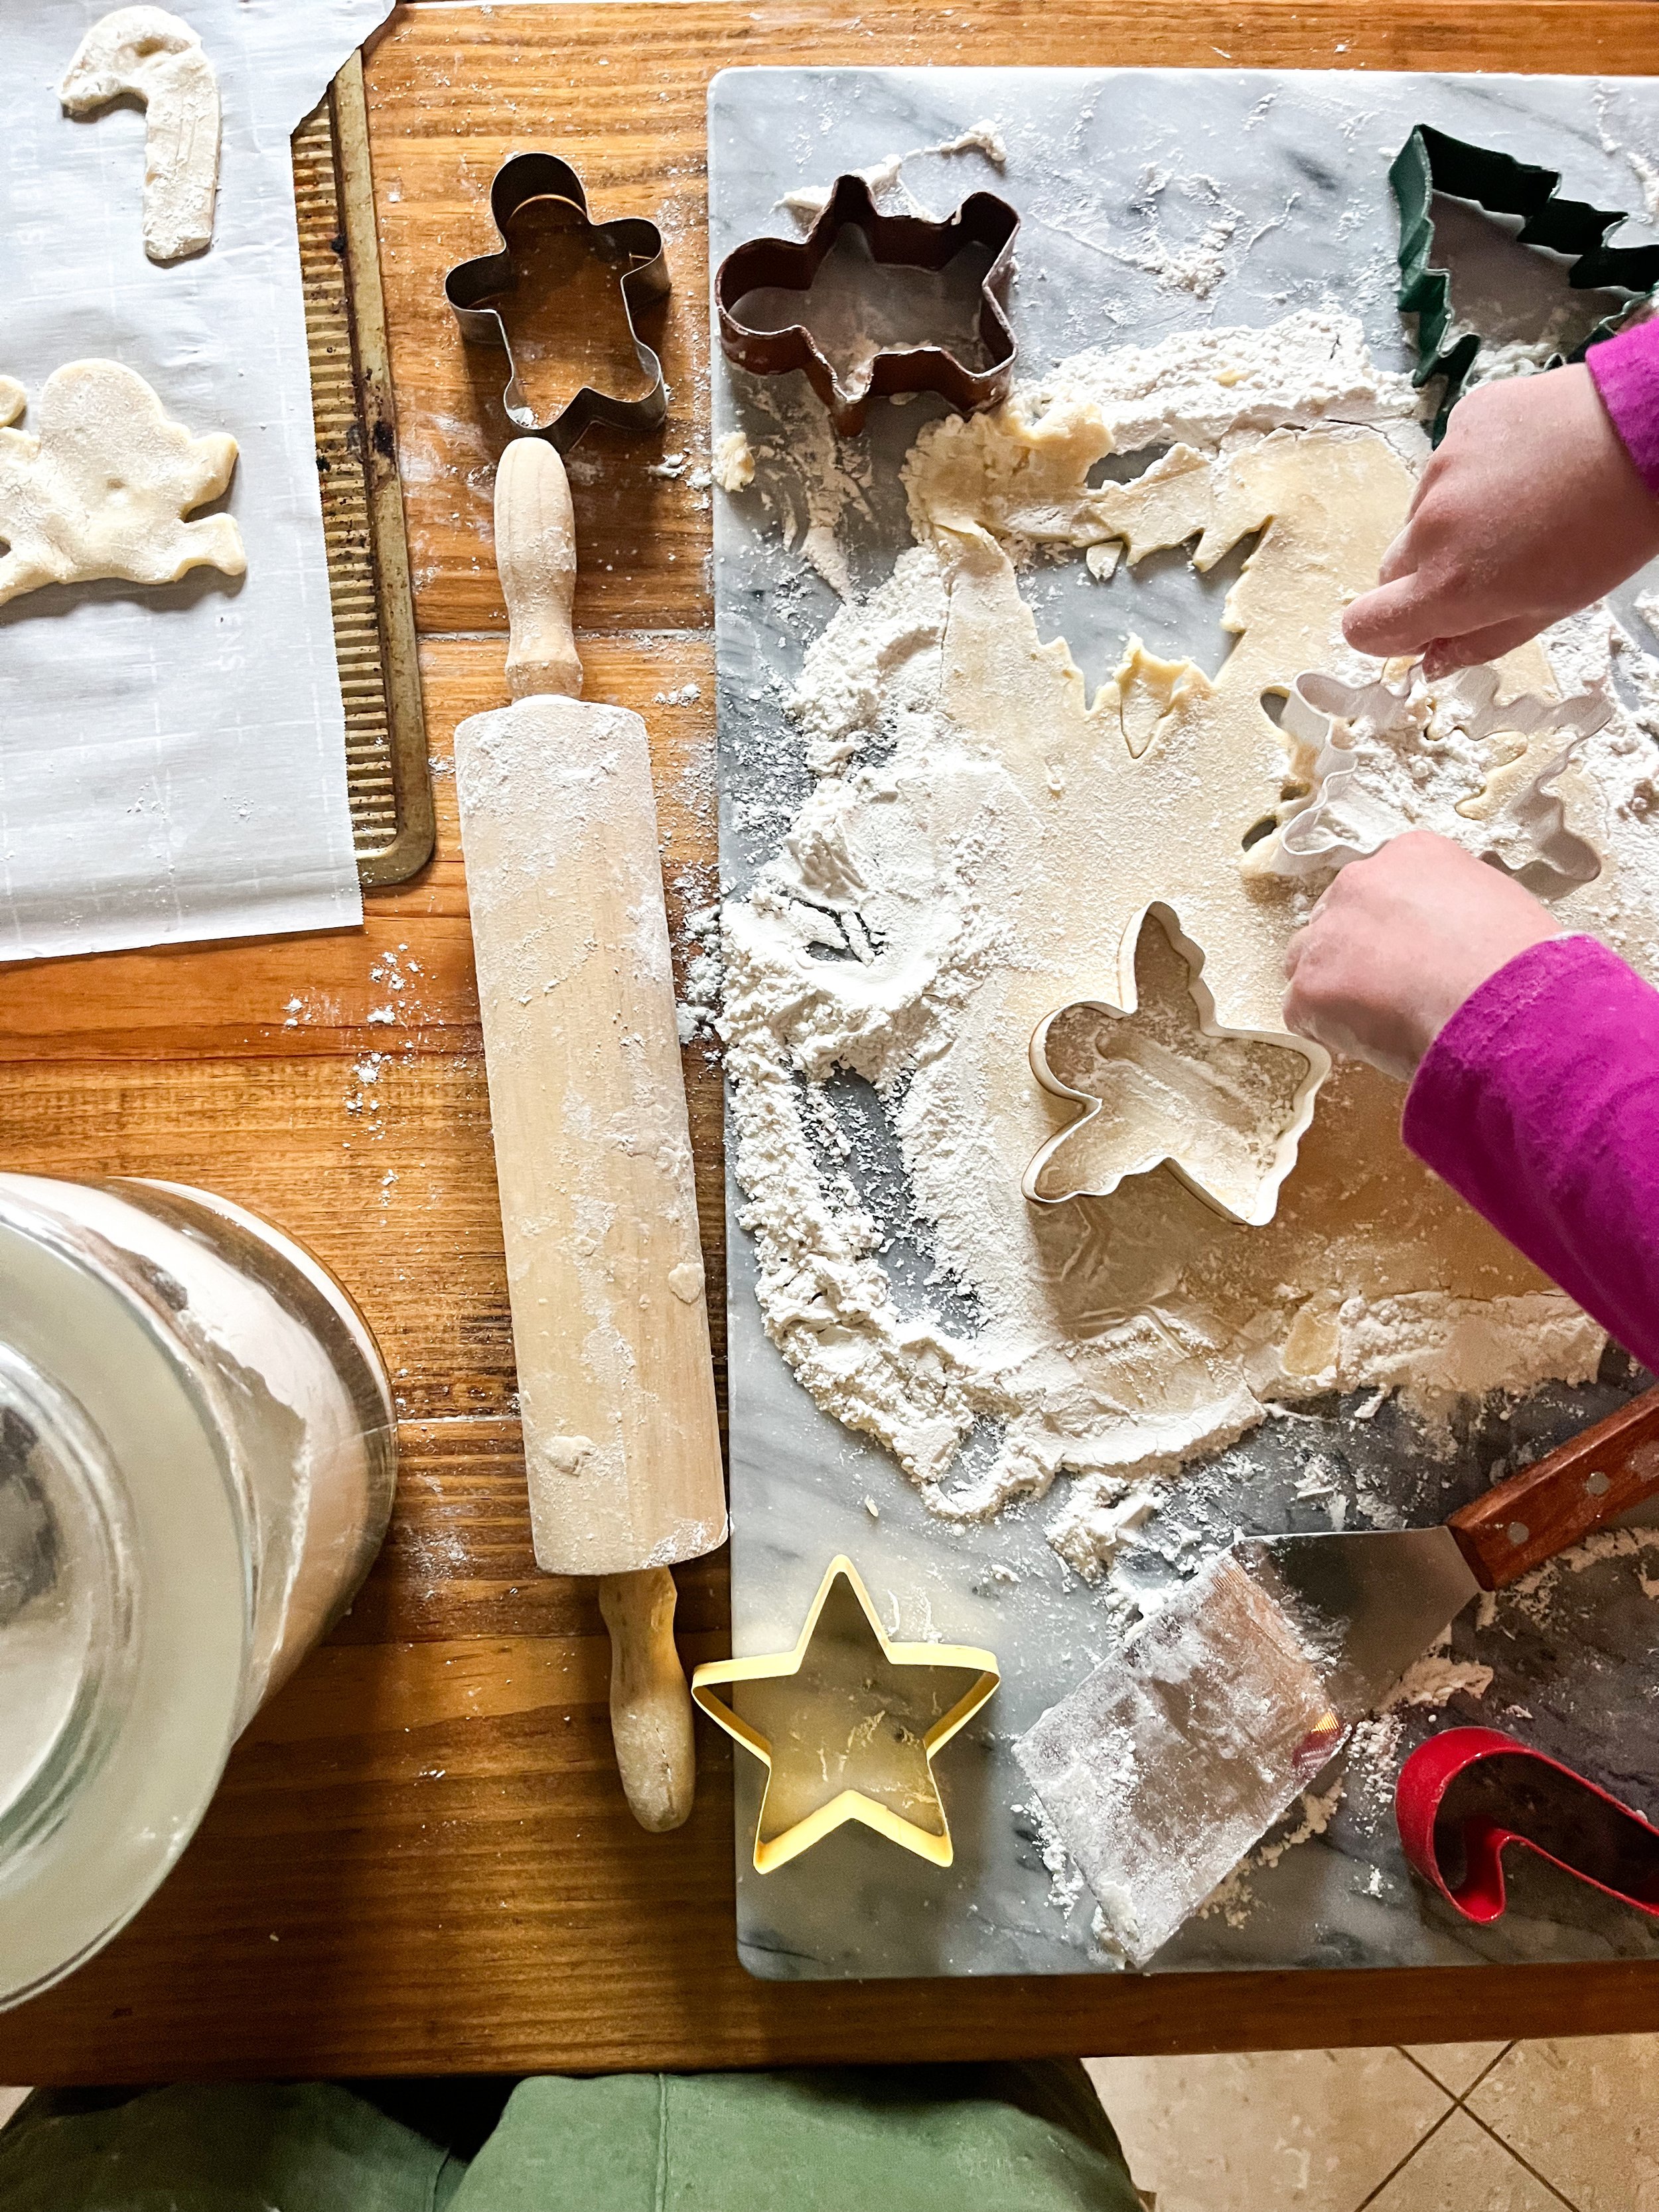
When you are ready to make the cookies, sprinkle flour on a clean work surface.
Preheat oven to 350 degrees.
Flour the rolling pin and roll out the dough to about 1/4 inch thick. Cut out desired shapes and place on a cookie sheet lined with parchment paper.
Bake about 9 minutes, or until edge are juuust about to turn golden brown (but not yet golden brown!) Take them out and let them cool 5 minutes on the sheet and transfer to a wire rack. Over-baking these cookies will create a crunchier cookie. Taking them out before golden will ensure these are nice and soft!
Once cool, decorate with frosting (recipe below)
Cookie Decorating Frosting
4 cups powdered sugar
1/2 cup butter, unsalted and softened
5 tablespoons (or more) milk
1 teaspoon vanilla extract
Instructions:
Cream together the butter and vanilla until fluffy and creamy. Add in slowly the powdered sugar, little by little. You can start adding in the milk as you alternate adding in the sugar.
Beat until becomes a fluffy icing - a few minutes.
Divide into bowls and color with desired food coloring.
To decorate: Use a pastry bag or Ziploc with a corner cut off, and spoon icing in the bag and pipe onto the cookies.